7x18 Man Cave Tiny House Design, Build, and Finish Overview
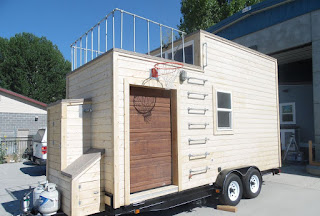
Upper Valley Tiny Homes wishes to show you everything from start to finish on how this amazing 7x18 man cave tiny house was put together and some simple tips on how we were able to build this house with its unique features.
If you are looking to get away from it all with you and your hunting buddies, than the man gave is what we can build for you. This man cave tiny house has everything needed to get you and your buddies off onto an adventure.
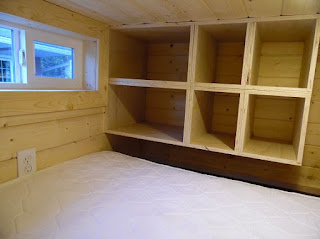
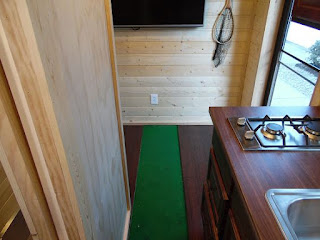
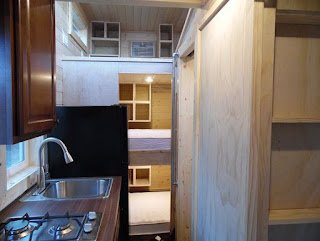
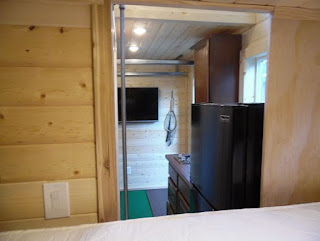
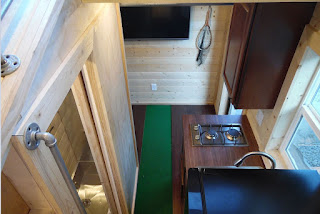
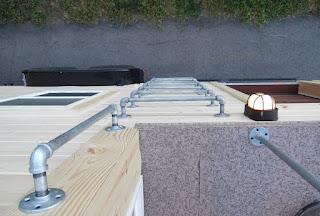
We include special features like solar, BBQ mounted out back, three bunks with gun racks, golf putting strip, deck on roof, basketball mount, and more.
This house is built to be completely off grid with a 500 Watt Solar kit, 50 gallons of water, grey holding tank, and a dry flush toilet.
Please view all details provided below to learn more on what is included in this house.
Rough Materials
- Double Axle Trailer
- 4x8 Smart Panel Siding
- Premium Standard Douglas Fir Studs for Framing
- CDX Plywood for Flooring
- VOC-Compliant Liquid Nails to Mount Our Sheets
- R-15 Fire Resistant Stone Wool Insulation
- Alex Plus Acrylic Latex Plus Silicone on All Seams
- Husky 6 Mil Plastic Sheet to Seal Deck from House
- 30 ½ Inch Zinc-Plated Hex Bolts Mounting House to Deck
- Pro Grade Roof Underlayment
- Metal Roofing
- Perma Roof Vent Boot
- 1/4” Drywall for Interior Walls
- 12 Double Pane Windows
- Corrugated Metal Siding
Electrical
- Square D Homeline 100 Amp 6-Space 12-Circuit Mount
- 6-19 T90 600 Volt Main
- 12-3 500 Watt for Major Appliances
- Type NMB 12/2
- Type NMB 10/2
- Ground Wire Mounted From Panel to Frame of Trailer
- GFCI Protected Lines
- Outlets
- Three Way Switches
- Standard Switches
- Light Boxes
- Standard Electrical Boxes
- Two Open Electrical Box
- Halo 5 in. and 6 in. Matte White Recessed LED
- 1 Exterior 50 Amp RV Inlet
- 5-6 Breakers
Plumbing
- 1/2” SharkBite PEX Pipe for Water Lines
- 1 RV Exterior Inlet for Hose
- 1-1/2” Black ABS Pipe for Drains and Venting
- 3” Black ABS Pipe for Black Water Systems
- Neptune Drop-in Stainless Steel 25 in
- Stiebel Eltron Water Heater
- 40 PSI Pressure Regulator
Finish Work
- Hampton Bay Cabinets
- Hampton Bay Laminate Flooring
- Glacier Bay 25 in. Vanity in Nutmeg with Porcelain Vanity Top
- Stairs & Cubbies Built With 3/4” Finished Plywood
- 1”x2” Base Boards
- 1”x3” Trim Around Windows & Doors
- 3” Crown Molding Around Corners of Ceiling
- Glacier Bay Builders 1-Handle 1-Spray Shower Faucet
- Pfister Cantara Single-Handle Pull-Out Sprayer Kitchen Faucet
- Glacier Bay Builders 4 in. Centerset 2-Handle Bath Faucet
- Butcher Block Counter tops
- Double Pane Windows
- Full Glass Exterior Door
Accessories:
- 2 Burner Stove Top
- Solar
- BBQ Stove
- Dry Flush Toilet
- Golf Putting Strip
- Toy Hauler Garage
- Basket Ball Mount
- Dart Throwing Board
- Deck on Roof
Our Building Process
Day 1 Building The Man Cave Tiny House
Whenever we start building our tiny homes, we always start pre framing all our walls on the ground to make sure the walls are professionally framed on a flat solid surface. We have seen other builders attempt frame on the trailer as they go, but I fear that doing it that way will be longer, more complicating, and more costly to frame on the trailer instead of pre framing on the floor.
Only disadvantage to frame on the floor withe one big section is that you will either need a crane to lift your wall or have 4-5 strong men lift the wall on the trailer.
I recommend building the wall in sections on the floor and have an extra hand help you set it on the trailer.
It typically takes about 2 days to frame an entire tiny house with two framers, but this first day was just pre framing the first two large walls. Here is a video overview of our progress below.
Day 2-3 Building The Man Cave Tiny House
We are falling behind schedule a little on our framing due to pulling our framers on to one of our other homes to finish up but we got all walls up and ready to sheet and install electrical and plumbing.
As we frame our walls we bolt our walls directly to the frame of the trailer every 2-3 feet to ensure that the walls will not blow off the trailer. We have also insulated the floor of the trailer before sheeting the floor so the house from top to bottom is insulated.
We had to stop and think for a bit to figure if we wanted to make a flat roof or a slanted roof and we voted on a flat roof with a commercial membrane roof to ensure that no moisture will penetrate the roof when it is flat.
Day 4 Building The Man Cave Tiny House
We mainly got all framing complete, but we were caught in a pickle trying to figure out if we should make a door to access the roof or have a window in the upper loft to access the loft and I am still sleeping on it tonight to figure if I should do it or not.
Our mechanical contractor came in and has started installing all electrical and plumbing through out the house. We will be installing LED lights along with a full solar kit with a back up battery system. If you are curious on what type of solar we use, here is a link below to the solar kit used.
Be advise that before installing electrical and plumbing on a tiny house, it is best to mount protectice metal plates over all wires and pipes in order to protect the lines from getting punctured by nails from drywall and exterior siding installation.
Day 5-6 Building The Man Cave Tiny House
All plumbing and electrical is complete, along with our insulation upgrade and house wrap. We install house wrap to add additional protection to the home from moisture penetrating the home. Especially when installing tongue and groove siding, it is best to have a moisture barrier protection cause tongue and groove may have easier access for moisture to penetrate cracks compared to other siding products.
We also use Roxul insulation because it is much much easier to install compared to standard insulation that you staple in. It is also water and fire resistant,
Roxul Insulation
House Wrap
Day 7 Building The Man Cave Tiny House
We now have all house wrap cut around the windows along with starting to install the 1" x 6" tongue and groove Gorman Pine siding on the exterior of the house. The siding that we are using can give you the option to install the siding on the rough side or smooth side. Half of our customers would rather have the rough side and others would rather have the smooth side.
When we install the siding we try to make sure that the joints stagger anywhere from 16"-24".
Here is a link to find where to get the siding:
http://www.homedepot.com/p/1-in-x-6-in-x-96-in-Gorman-Pine-Tongue-and-Groove-Siding-6-Pack-168PTG6PK/207045637
Day 8-9 Building The Man Cave Tiny House
After the tongue and groove siding is placed on the house we have placed the windows on the house by first caulking around the opening, placing the window over the caulking, then seal the windows around the boarder with a vycor window wrap. We place the wrap on the bottom of the windows, then the sides, and finally a piece on the top to protect the windows from moisture barrier.
Here is a link to the window wrap:
Day 10 Building The Man Cave Tiny House
After installing all tongue and groove on the outside of the home, we worked on finishing up installing the tongue and groove on the interior of the house. Now we are installing the laminate flooring through out the house. We generally like to install laminate flooring first before putting up some interior walls or cabinets to save us time from notching the laminate to get around any obstacles.
Once all the laminate flooring is installed we can finish installing all trim, base boards, and any other miscellaneous trim needed to install.
Day 11 Building The Man Cave Tiny House
We have gotten a lot accomplished within the past day with this man cave. We have enclosed the bathroom, Installed cabinets, and installed most the the trim. It seems that we have very little left to do for this last day, which includes the garage door, man door, and some final minor trim work.
Final Video Overview
We are very proud of what we have accomplished with this home. We have had some pretty extreme opinions on this house because it was built more for a hunting lodge instead of it being a typical home, but a tiny home is built to be unique, fun, and productive. We are excited to show you the final video overview of this home and hope you have enjoyed our building tour of this home.
Please View Our Full Photo Overview


